Motorhome Rehab Pt 4
Part 4 Weekend work.

Weather has been the enemy this week. Almost every day has been rainy and windy, which is terrible to rehab a leak.
First task was to clean trim and fiberglass without damaging the fiberglass.
After reading some different websites and blogs, I landed on Goof Off and Mineral Spirits. in addition to a Chisel (not recommended) plastic scraper, wire brush and towel.


(Disclaimer: Neither of these things are great for the fiberglass or the paint on the trim. Please be extra careful and only use what is 100% necessary. I am worried about long term effects on the fiberglass but so far it has been ok, and I have only used VERY small amounts. Some of the paint on the trim has come off from the scraping and solutions, but I am not concerned too much, I can always repaint it if needed.)


Eternabond is VERY sticky! It will take a lot of scraping and rubbing to get off. If you scrape and pull it slowly it comes off nicely in many places.


The mineral spirits also works magic on the black spots on the fiberglass, but remember there is a possibility that it will be bad for the fiberglass! I am sure that there are better products to help with this, but for now it works well. I also intend to put a nice thick layer of wax on the fiberglass to protect it more.
Back side of the fiberglass was a mess. We debated endlessly about how far down to scrape and sand the backs side. I sanded off MOST of the original wood left on the back, but some was just too stubborn. I didn't want to go down to bare fiberglass so we decided that I would get to the fiberglass glue in most areas, but the stubborn areas would be ok as long as the wood was clean and adhered VERY well to the fiberglass. (note the areas that I left were VERY thin and at most one thin layer of wood)


Rebuilding the base of the cab.
This has been the scariest and most important part of this repair. The thickness has to be 1 in thick when completed and it has to fit perfectly. There are a few hurdles.
1. Plywood only comes in 8 ft lengths. (unless I drive 8 hours to Ohio, apparently Menards carries bigger sheets but good luck finding that in NJ) An 8 ft length is not enough to span the entire cab, which means we have to piece two pieces together. In the original build there were two pieces, but they were not connected to each other and had very few "tie in" spots to provide extra support.


We used the fiberglass piece to trace out the shape exactly.
Dry fit to make sure it all fit properly before adding the extra thickness and voila! perfect fit!


2. We need to glue a layer of hardboard to the top and bottom of the plywood to reach the 1 inch thickness, so we had to find the right glue and match the pieces. Started with Gorilla wood glue and ended up with Titebond wood glue cause that was what we had in the garage. Both worked great. Added a few screws to make sure it stays.
Next we rough cut the hardboard sheets and glued them on the completed plywood sheet, with a few added screws for good measure.

Finally my husband used his router to flush cut the edges to match the plywood.

Finished product looks GREAT and is SO STURDY! All we need now is to glue the fiberglass panel to the bottom before installing it. (we are doing some research on the glues and tackiness before placing it to be sure we can adjust it if necessary. It has to be perfect or it won't fit.)
Cab paint
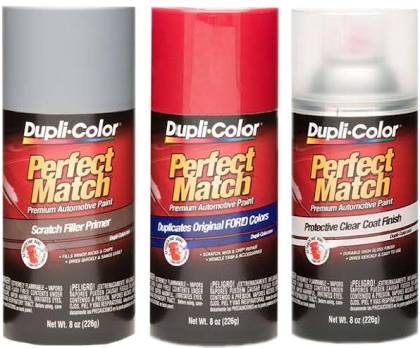
Where the cab meets the base, there is paint damage. Its has stripped, rusted and peeled.


I have sanded/dremeled away the loose edges and rust and decided on this product. It is readily available at Advance Auto Parts or Autozone and the reviews seem promising. This is an area of the cab that no one will ever see, I just want the paint to stop peeling under the base. I did forgot to buy the clear coat so I will go back today so that it is sealed up properly.


Great weekend of work.
On the agenda for the next few days:
- Second coat and clear coat the cab
- Build the second half of the cab base.
- Glue on the fiberglass panel
- Pull and clean the rest of the outside trim. (I REALLY don't want to take it all off to the roof but as Mike Holmes says "DO IT RIGHT"
Down the road if all goes well...
- Install the base piece
- Install the front piece
- retape all of the edge seams
- reinstall the moldings
- re-caulk roof seams
- work on inside.
Stay tuned!!!

Weather has been the enemy this week. Almost every day has been rainy and windy, which is terrible to rehab a leak.
First task was to clean trim and fiberglass without damaging the fiberglass.
After reading some different websites and blogs, I landed on Goof Off and Mineral Spirits. in addition to a Chisel (not recommended) plastic scraper, wire brush and towel.
(Disclaimer: Neither of these things are great for the fiberglass or the paint on the trim. Please be extra careful and only use what is 100% necessary. I am worried about long term effects on the fiberglass but so far it has been ok, and I have only used VERY small amounts. Some of the paint on the trim has come off from the scraping and solutions, but I am not concerned too much, I can always repaint it if needed.)


Eternabond is VERY sticky! It will take a lot of scraping and rubbing to get off. If you scrape and pull it slowly it comes off nicely in many places.


The mineral spirits also works magic on the black spots on the fiberglass, but remember there is a possibility that it will be bad for the fiberglass! I am sure that there are better products to help with this, but for now it works well. I also intend to put a nice thick layer of wax on the fiberglass to protect it more.
Back side of the fiberglass was a mess. We debated endlessly about how far down to scrape and sand the backs side. I sanded off MOST of the original wood left on the back, but some was just too stubborn. I didn't want to go down to bare fiberglass so we decided that I would get to the fiberglass glue in most areas, but the stubborn areas would be ok as long as the wood was clean and adhered VERY well to the fiberglass. (note the areas that I left were VERY thin and at most one thin layer of wood)


Rebuilding the base of the cab.
This has been the scariest and most important part of this repair. The thickness has to be 1 in thick when completed and it has to fit perfectly. There are a few hurdles.
1. Plywood only comes in 8 ft lengths. (unless I drive 8 hours to Ohio, apparently Menards carries bigger sheets but good luck finding that in NJ) An 8 ft length is not enough to span the entire cab, which means we have to piece two pieces together. In the original build there were two pieces, but they were not connected to each other and had very few "tie in" spots to provide extra support.


We used the fiberglass piece to trace out the shape exactly.
Dry fit to make sure it all fit properly before adding the extra thickness and voila! perfect fit!


2. We need to glue a layer of hardboard to the top and bottom of the plywood to reach the 1 inch thickness, so we had to find the right glue and match the pieces. Started with Gorilla wood glue and ended up with Titebond wood glue cause that was what we had in the garage. Both worked great. Added a few screws to make sure it stays.
Next we rough cut the hardboard sheets and glued them on the completed plywood sheet, with a few added screws for good measure.

Finally my husband used his router to flush cut the edges to match the plywood.

Finished product looks GREAT and is SO STURDY! All we need now is to glue the fiberglass panel to the bottom before installing it. (we are doing some research on the glues and tackiness before placing it to be sure we can adjust it if necessary. It has to be perfect or it won't fit.)
Cab paint
Where the cab meets the base, there is paint damage. Its has stripped, rusted and peeled.


Great weekend of work.
On the agenda for the next few days:
- Second coat and clear coat the cab
- Build the second half of the cab base.
- Glue on the fiberglass panel
- Pull and clean the rest of the outside trim. (I REALLY don't want to take it all off to the roof but as Mike Holmes says "DO IT RIGHT"
Down the road if all goes well...
- Install the base piece
- Install the front piece
- retape all of the edge seams
- reinstall the moldings
- re-caulk roof seams
- work on inside.
Stay tuned!!!


Comments
Post a Comment